Can you paint over stained wood? This question has puzzled DIY enthusiasts and professional painters alike. Whether you're looking to update an old piece of furniture or revamp your wooden floors, understanding the intricacies of painting over stained wood is crucial. But fear not! This comprehensive guide will unravel the mysteries surrounding this topic, providing you with the knowledge and confidence to tackle your next project. So, if you're curious about the possibilities and techniques involved in painting over stained wood, read on!
Painting over stained wood is not only possible but can also lead to stunning transformations. While the process may seem daunting at first, especially when dealing with surfaces that have been treated with stains or sealants, with the right preparation and materials, you can achieve a smooth and professional finish. Knowing when and how to paint over stained wood can save you time and money, and most importantly, it can breathe new life into tired, outdated spaces.
This article will delve into the step-by-step process of painting over stained wood, from selecting the appropriate tools and materials to mastering the techniques required for a flawless finish. Additionally, we'll address common challenges and mistakes, providing you with expert tips and solutions. By the end of this guide, you'll be equipped with the knowledge and skills to confidently undertake any project involving stained wood. Let's dive in!
Table of Contents
- Understanding Stained Wood
- Preparation: The Key to Success
- Choosing the Right Paint and Primer
- Step-by-Step Guide: How to Paint Over Stained Wood
- Tools and Materials You'll Need
- Common Mistakes to Avoid
- Expert Tips for a Perfect Finish
- Maintaining Painted Stained Wood
- Frequently Asked Questions
- Conclusion
- External Resources
Understanding Stained Wood
Before diving into the process of painting over stained wood, it's essential to understand what stained wood is. Stained wood refers to wood that has been treated with a pigmented solution to enhance its natural grain and color. Stains penetrate the wood fibers, providing a rich, deep color that can range from light oak to dark mahogany. Unlike paint, which sits on the surface, stains are absorbed by the wood, making them more challenging to cover.
Stains can be oil-based or water-based, each with its own set of characteristics. Oil-based stains are known for their durability and ability to highlight the wood's natural beauty, while water-based stains are favored for their quick drying times and ease of cleanup. Understanding the type of stain used on your wood surface is crucial in determining the best approach for painting over it.
Another factor to consider is whether the stained wood has been sealed. Sealing is a process where a protective layer is applied over the stain to shield it from moisture, dirt, and damage. This sealant can be varnish, polyurethane, or shellac, and it affects how well paint adheres to the surface. Knowing whether your wood is sealed will help you choose the appropriate primer and painting technique.
Preparation: The Key to Success
Preparation is the cornerstone of any successful painting project, and this is especially true when working with stained wood. Proper preparation ensures that the paint adheres well and results in a smooth, long-lasting finish. Here's a step-by-step guide to preparing stained wood for painting:
Cleaning the Surface
Start by thoroughly cleaning the stained wood surface to remove any dust, dirt, or grease. Use a mild detergent mixed with water and a soft cloth or sponge to wipe down the surface. Pay special attention to areas with visible stains or residue. Once clean, allow the wood to dry completely before proceeding to the next step.
Sanding the Wood
Sanding is a crucial step in preparing stained wood for painting. It helps to roughen the surface, allowing the paint and primer to adhere better. Use medium-grit sandpaper (around 120-150 grit) to sand the entire surface. Be sure to sand in the direction of the wood grain to prevent scratches. After sanding, wipe away any dust with a tack cloth or a damp cloth.
Repairing Imperfections
Inspect the wood for any cracks, dents, or holes. Use wood filler to repair these imperfections, following the manufacturer's instructions. Once the filler dries, sand the repaired areas to ensure a smooth surface. This step is crucial for achieving a flawless finish.
Priming the Surface
Priming is essential when painting over stained wood, as it creates a barrier between the stain and the paint, preventing bleed-through. Choose a high-quality primer specifically designed for stained surfaces. Apply the primer evenly with a brush or roller, and allow it to dry according to the manufacturer's instructions. In some cases, a second coat of primer may be necessary for optimal coverage.
Choosing the Right Paint and Primer
Selecting the right paint and primer is vital for a successful project. The type of paint you choose will depend on the desired finish and the specific characteristics of the wood you're working with. Here are some considerations to keep in mind:
Primer Selection
As mentioned earlier, choosing the right primer is crucial. For stained wood, opt for a stain-blocking primer that can effectively seal the stain and prevent it from bleeding through the paint. Oil-based primers are often recommended for this purpose, but there are also high-performance water-based options available.
Paint Types
When it comes to paint, you have several options, including latex, oil-based, and chalk paint. Latex paint is popular for its ease of use, quick drying time, and low odor. It's a great choice for most indoor projects. Oil-based paint, on the other hand, offers a durable, high-gloss finish, making it ideal for high-traffic areas or exterior surfaces. Chalk paint is known for its matte finish and vintage look, perfect for furniture and decorative pieces.
Color and Finish
Consider the color and finish you want to achieve. Lighter colors may require more coats to cover the stain completely, while darker colors can provide better coverage. The finish, whether matte, satin, or gloss, will affect the final appearance and durability of the painted surface.
Step-by-Step Guide: How to Paint Over Stained Wood
Now that you've prepared the wood and chosen the right materials, it's time to start painting. Follow this step-by-step guide for a successful project:
Step 1: Apply the Primer
Using a brush or roller, apply the stain-blocking primer evenly over the entire surface. Be sure to cover all areas, including corners and edges. Allow the primer to dry completely before proceeding to the next step. If necessary, apply a second coat of primer for additional coverage.
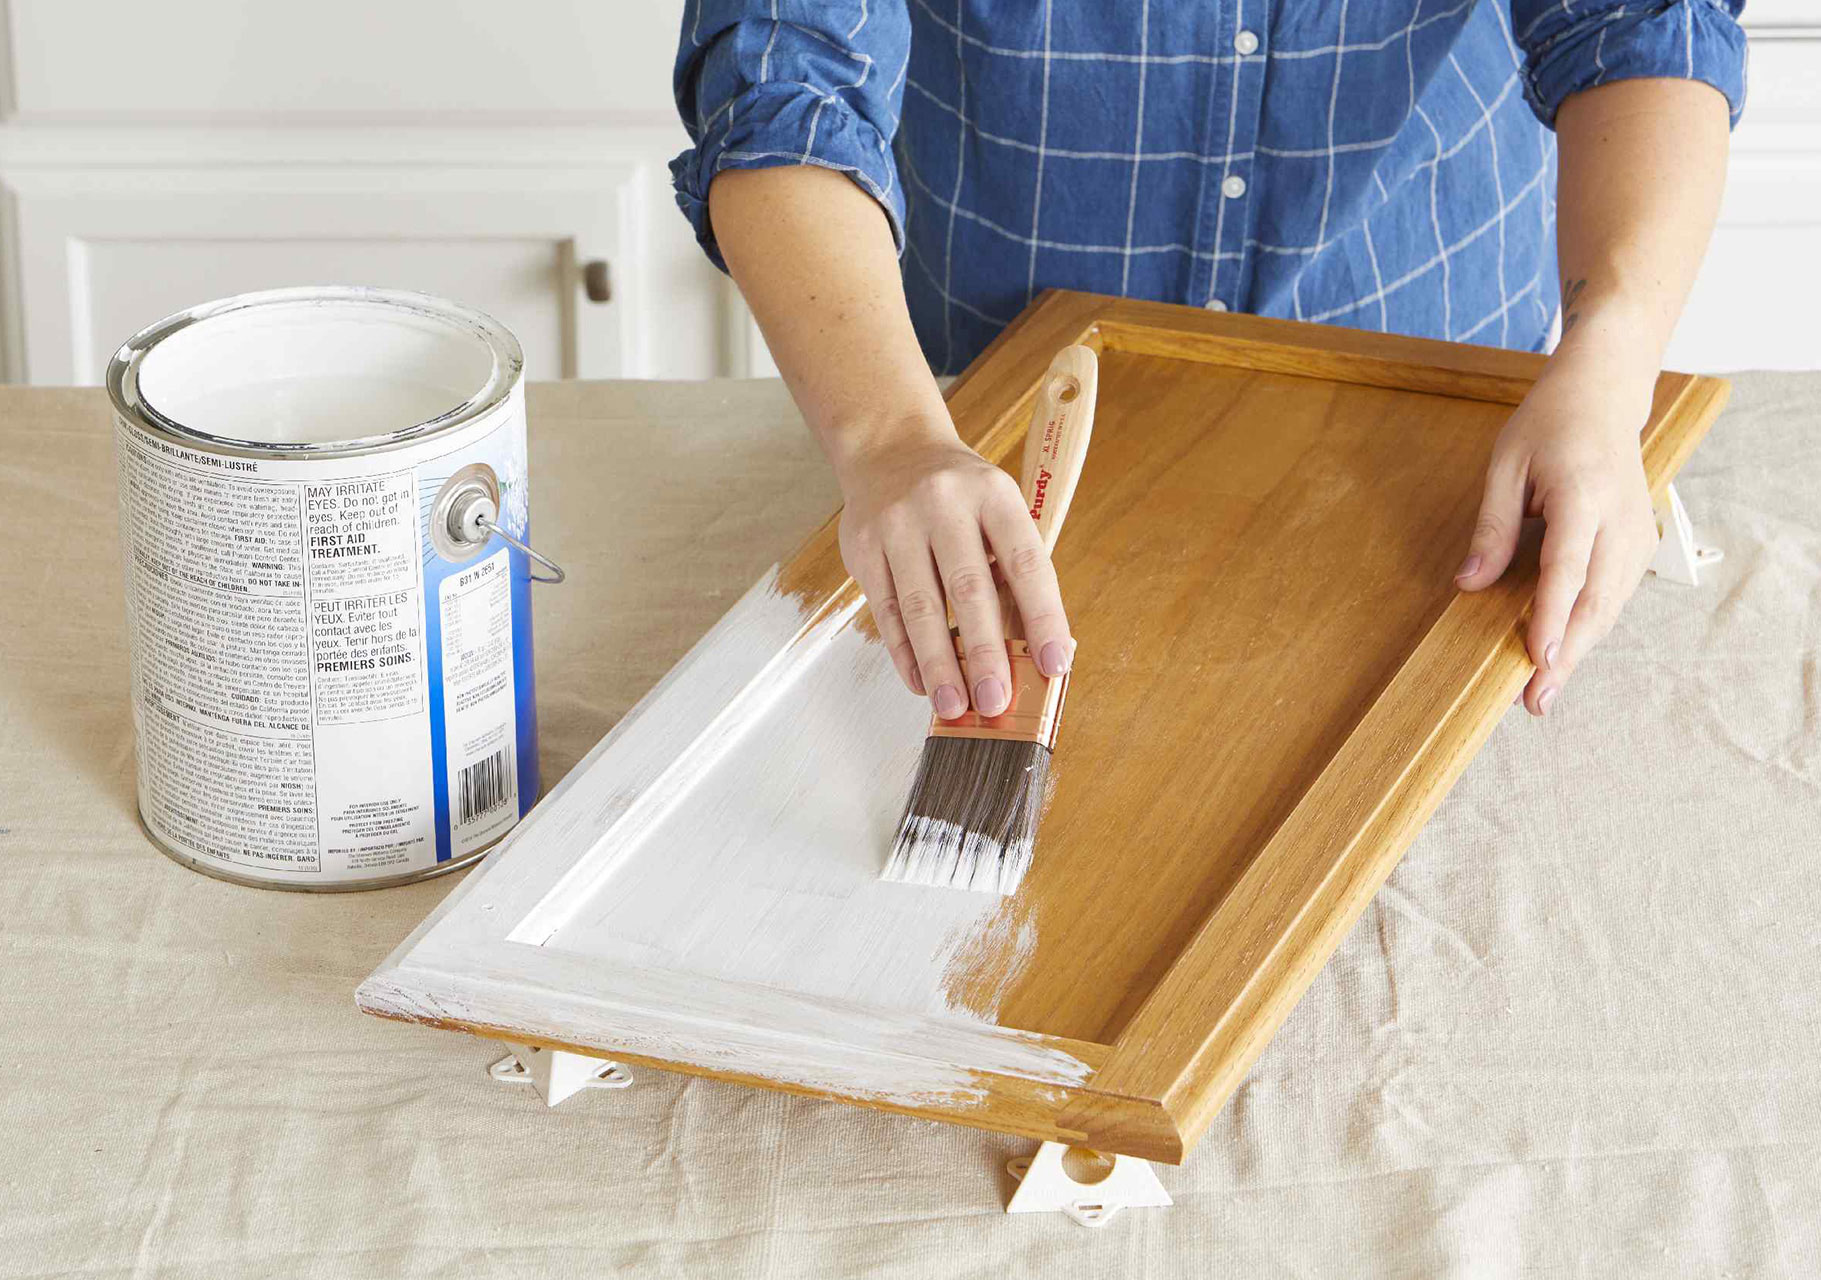
Step 2: Paint the Surface
Once the primer is dry, it's time to paint the surface. Start by cutting in along the edges and corners with a brush, then use a roller to cover larger areas. Apply the paint in thin, even coats, allowing each coat to dry before applying the next. Depending on the color and type of paint, you may need two to three coats for full coverage.
Step 3: Inspect and Touch Up
After the final coat of paint has dried, inspect the surface for any missed spots or imperfections. Use a small brush to touch up any areas that need additional coverage. This step ensures a polished and professional finish.
Step 4: Apply a Protective Finish (Optional)
If desired, apply a clear protective finish over the painted surface to enhance durability and longevity. A polyurethane or polyacrylic topcoat can provide added protection against scratches, moisture, and wear. Follow the manufacturer's instructions for application and drying times.
Tools and Materials You'll Need
Having the right tools and materials is essential for a successful painting project. Here's a list of items you'll need:
- Mild detergent and water
- Soft cloth or sponge
- Medium-grit sandpaper (120-150 grit)
- Tack cloth or damp cloth
- Wood filler
- High-quality stain-blocking primer
- Paint (latex, oil-based, or chalk paint)
- Paintbrushes and rollers
- Drop cloths or tarps
- Painter's tape
- Clear protective finish (optional)
Common Mistakes to Avoid
Even with careful preparation and planning, mistakes can happen. Here are some common pitfalls to watch out for and how to avoid them:
Skipping the Sanding Step
Sanding is crucial for paint adhesion. Skipping this step can lead to peeling or chipping paint. Always sand the wood thoroughly before priming and painting.
Using the Wrong Primer
Not all primers are created equal. Using a primer that isn't designed for stained wood can result in bleed-through. Choose a stain-blocking primer for the best results.
Applying Too Thick Paint Coats
Thick coats of paint can lead to drips and uneven finishes. Apply thin, even coats and allow each one to dry before adding the next.
Ignoring Drying Times
Rushing the drying process can compromise the finish. Be patient and allow adequate drying time between coats of primer and paint.
Expert Tips for a Perfect Finish
Achieving a flawless finish requires attention to detail and careful technique. Here are some expert tips to help you along the way:
Work in a Well-Ventilated Area
Painting in a well-ventilated area ensures proper drying and reduces exposure to fumes. Open windows and doors or use fans to improve airflow.
Use Quality Brushes and Rollers
Invest in high-quality brushes and rollers for a smoother application and better coverage. Cheap brushes can shed bristles, while low-quality rollers may leave streaks.
Test Paint Colors Before Committing
Before painting the entire surface, test your chosen paint color on a small, inconspicuous area to ensure you're happy with the result.
Maintain a Wet Edge
Maintain a wet edge while painting to avoid visible lines or streaks. This technique involves working quickly and overlapping each stroke slightly with the previous one.
Maintaining Painted Stained Wood
Once your project is complete, proper maintenance will keep your painted wood looking beautiful for years to come. Here are some maintenance tips:
Regular Cleaning
Clean painted surfaces regularly with a soft cloth and mild detergent to remove dust and dirt. Avoid abrasive cleaners that can damage the paint.
Touch-Up as Needed
Over time, painted surfaces may experience wear and tear. Keep a small amount of leftover paint for touch-ups to address any chips or scratches promptly.
Avoid Excessive Moisture
Moisture can damage painted wood. Use coasters and placemats to protect surfaces from spills and condensation.
Frequently Asked Questions
1. Can you paint over stained wood without sanding?
While sanding is recommended for optimal adhesion, you can use a deglosser or liquid sandpaper to prep the surface without sanding. However, sanding provides the best results.
2. What type of paint works best on stained wood?
Latex paint is a popular choice for indoor projects due to its ease of use and quick drying time. For outdoor projects or high-traffic areas, consider using oil-based paint for added durability.
3. How do you prevent bleed-through when painting over stained wood?
To prevent bleed-through, use a high-quality stain-blocking primer before painting. This creates a barrier that prevents the stain from seeping through the paint.
4. Can you use chalk paint on stained wood?
Yes, chalk paint can be used on stained wood. It provides a matte finish and requires minimal prep work, making it a popular choice for furniture and decorative pieces.
5. How many coats of paint are needed to cover stained wood?
The number of coats needed depends on the color and type of paint. Generally, two to three coats are sufficient for full coverage. Lighter colors may require additional coats.
6. Should I seal painted stained wood?
Sealing painted stained wood with a clear protective finish is optional but recommended for added durability and protection against moisture and wear.
Conclusion
Painting over stained wood can be a rewarding and transformative project with the right approach and materials. By understanding the characteristics of stained wood, preparing the surface thoroughly, and choosing the appropriate paint and primer, you can achieve a beautiful and long-lasting finish. Remember to follow the steps outlined in this guide, avoid common mistakes, and apply expert tips for the best results. With patience and attention to detail, you'll be able to breathe new life into your stained wood surfaces.
External Resources
For additional guidance and inspiration, consider exploring the following external resources:
- Home Depot: How to Prep Stained Wood for Painting
- Bob Vila: How to Paint Over Stain
- This Old House: How to Paint Furniture